How to practise volleyball: ready-to-run sessions and drills
Published 5 August 2026

If you want measurable improvement this week, run three focused sessions: one solo technical session, one conditioning and footwork session, and one scrimmage-style session that forces your priority skill under pressure. That structure alone will produce more progress than a month of unplanned kick-abouts.
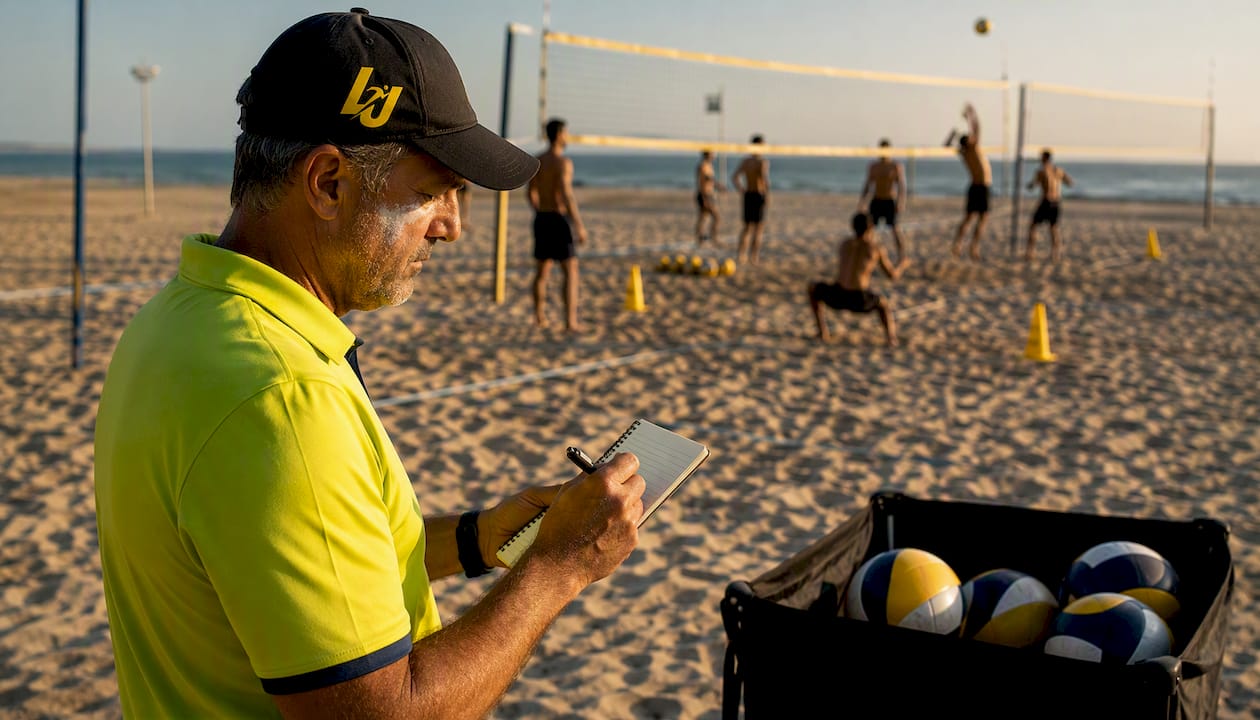
Here is why each one matters. The solo technical session builds the touch and muscle memory you cannot develop in chaotic group play. The conditioning session trains the lateral speed and reactive reads that determine whether your technique holds up when you are tired. The scrimmage session is where you find out whether any of it transfers.
This week’s quick-start checklist:
- Session 1 (solo technical, 30–45 min): wall passing progressions, solo serving to target zones, self-set-and-catch sequences
- Session 2 (conditioning/footwork, 30 min): lateral shuffles, crossover steps, reactive cue drills
- Session 3 (scrimmage-focused, 45–60 min): 2v2 or 3v3 with a scoring constraint tied to your priority skill
Measure success by Friday: track one metric per session (e.g. consecutive passes without error, serves landing in target zone). If the number goes up across the week, the plan is working.
Table of Contents
- What do ready-to-run session templates look like?
- Solo drills you can run without a net or partners
- High-value partner and small-group drills
- Conditioning and reaction drills that support your volleyball skills
- How often should you practise, and what does a 4-week plan look like?
- Common practice mistakes and how to fix them
- How to film practice and track the metrics that matter
- Why do these drills work? The motor-learning principles behind them
- How to build mental skills into your practice sessions
- Recovery and injury prevention for volleyball players
- Key takeaways
- What actually separates players who improve from those who plateau
- Levelup360hq: structured tracking for coaches and clubs who want real data
- Useful sources and further reading
What do ready-to-run session templates look like?
The biggest reason sessions fail is not effort. It is poor design. Coaching resources consistently point to choosing one clear purpose per session, using stations to maximise reps, and adding a constraint that forces the behaviour you want. These three templates give you that structure out of the box.
30-minute session (solo or pair)
| Phase | Duration | Focus |
|---|---|---|
| Warm-up | 5 min | Dynamic movement: leg swings, hip circles, arm rotations, 2 × court-length jog |
| Priority skill | 12 min | Wall passing or solo serving to target zones |
| Secondary skill | 8 min | Self-set sequences or footwork patterns |
| Finish | 5 min | 50-pass challenge or 10-serve accuracy test |
Set a measurable target before you start. “I will complete 50 consecutive forearm passes” is a session objective. “I will practise passing” is not.
45-minute session (2–4 players)
| Phase | Duration | Focus |
|---|---|---|
| Warm-up | 8 min | Pepper (pass-set-hit) at low intensity, then increase pace |
| Priority skill | 15 min | Serve-receive passing to target zone with scoring |
| Secondary skill | 12 min | Setting accuracy drill: setter targets corners, hitters call the zone |
| Conditioned game | 10 min | 2v2 with rule: point only counts if pass lands in target |
60-minute session (team or club)
| Phase | Duration | Focus |
|---|---|---|
| Warm-up | 10 min | Dynamic movement, then controlled pepper |
| Priority skill | 20 min | Serve-receive system with live serving |
| Secondary skill | 15 min | Transition hitting off a dig-set sequence |
| Conditioned game | 12 min | 3v3 or 4v4 with constraint (e.g. must use back-row attack to score) |
| Cool-down | 3 min | Static stretching, brief debrief |
Before every session, write down one target. After it, write down whether you hit it. That two-line log is more useful than any training app if you actually do it.
Solo drills you can run without a net or partners
Solo training is underrated at every level. USA Volleyball recommends marking the regulation net height on a wall (2.24 m for women, 2.43 m for men) and standing 9–10 metres away to simulate realistic serve and spike trajectories. That single setup change turns a casual wall session into something that actually transfers to match play.
Wall passing progressions
Start 8–10 feet (roughly 2.5–3 m) from the wall for beginners, then move back to 9–10 metres as your control improves. The goal is not to return the ball to the same spot every time. Playing the ball ‘up’ and at an angle to a target forces lateral movement and produces far higher match transfer than flat, repetitive returns.
Progression steps:
- Level 1: 50 consecutive forearm passes to the wall, focusing on platform angle and ball height
- Level 2: Add a target zone (tape a 60 cm square on the wall); count how many passes land in it per 30 attempts
- Level 3: Alternate forearm and overhead passes; add a step to the side before each contact to simulate movement
Gamify it: challenge yourself to hit 10 in a row in the target zone before moving to the next level. Reset the count on every miss.
Self-set sequences for hand positioning
Toss the ball to yourself at head height, set it straight up, let it drop, catch it, and repeat. That sounds simple. The value is in the repetition: your hands learn the correct contact point without the chaos of a live ball coming at pace. Once the contact feels automatic, progress to self-set-and-move: set the ball, shuffle two steps sideways, and set again before it drops.
Rep scheme: 3 sets of 20 contacts, with a 30-second rest between sets.
Solo serving to target zones
Mark three zones on the far side of the court (or use cones if you have access to a court). Serve 10 balls to each zone and record how many land in target. Float serves are ideal for this drill because the unpredictable flight path forces you to commit to a clean contact point rather than relying on spin.
Pro Tip: Record your serve accuracy as a percentage each session (e.g. 7/10 = 70%). Track it across four weeks. If the number is not climbing, your contact point or toss is inconsistent — film one set of 10 serves from behind and watch your toss hand.
Solo approach and hitting off a self-toss
Toss the ball slightly in front of you, take a full three-step or four-step approach, and swing. The critical detail: avoid rhythm hitting. Standing close to a wall and tapping the ball repeatedly trains a shortened arm swing that will not hold up in a match. Stand far enough back that you must swing through the ball over the marked net height, as if hitting around a blocker.
High-value partner and small-group drills
Two players can generate more quality reps per hour than a full team running a poorly designed six-on-six. The key is structure and a scoring rule that creates pressure.
-
Pass-set-hit chain (2 players): Player A serves or tosses to Player B, who passes to the target. Player A sets from the target, Player B hits. Rotate after 10 reps. Scoring: count kills only. Reset the score if the pass misses the target zone. This single constraint forces Player B to pass accurately rather than just getting the ball up.
-
Dig-set-hit sequence (3 players): Player A attacks from position 4, Player B digs, Player C sets, Player B hits the second ball. Rotate positions every 8 reps. The constraint: the dig must land within 2 metres of the setter’s target for the sequence to count. Anything outside that zone restarts the chain.
-
2v2 with a scoring rule (4 players): Standard rally scoring, but a point only counts when the attacking team uses a set from a pass that landed in the target zone. This forces both teams to prioritise serve-receive quality rather than just swinging at anything.
-
3v3 with limited sets (6 players): Each team gets one set per rally. No second sets. This forces hitters to read the first ball and make a decision quickly, which is exactly what match play demands.
Structuring a 20–30 minute small-group block: spend the first 10 minutes on a chain drill (pass-set-hit or dig-set-hit), the middle 10 on a constrained game, and the final 5–10 on free play with one rule still active. Removing all constraints at the end lets players consolidate what they have just practised under slightly lower pressure.
Conditioning and reaction drills that support your volleyball skills
Gym strength matters, but pairing court movement patterns with ball work replicates match demands far better than isolated gym sessions. The following circuit takes 20 minutes and fits inside any session.
Court conditioning circuit (repeat twice):
- Lateral shuffle across the court and back (4 × width), focusing on low hips and crossover steps on the return
- Short sprint to the net, touch the tape, backpedal to the 3-metre line, repeat 6 times
- Reaction drill: partner calls “left” or “right” at random; you shuffle two steps in that direction and touch a cone before returning to centre
- Crossover step drill: set up 4 cones in a square (2 m apart); move around the square using crossover steps only, changing direction on a whistle
For jump development, lateral lunges, single-leg Romanian deadlifts and plyometric progressions build the eccentric strength that controls your landing and protects your knees. Start with bodyweight lateral lunges (3 × 10 each side), then add a box jump or broad jump once the landing mechanics are clean.
For reactive decision-making, use a visual cue drill: stand in serve-receive position while a partner holds two coloured cones behind the net. When they raise one, you shuffle to the corresponding side and call the colour. This sounds trivial. After 3 minutes of it, your lateral read speed is noticeably sharper.
Pro Tip: Integrate conditioning inside skill sessions rather than bolting it on at the end. A lateral shuffle before each wall-pass rep, or a short sprint between serving attempts, keeps the neuromuscular demand specific to volleyball and stops conditioning from feeling like punishment.
For a deeper look at the reactive strength work that underpins these drills, this guide to reactive strength exercises covers the progressions that transfer most directly to court sport.
How often should you practise, and what does a 4-week plan look like?
Frequency depends on where you are. Beginners benefit most from two sessions per week: one technical, one light conditioning. Intermediates can handle three sessions (two technical, one conditioning or scrimmage). Advanced players training for competition typically run four to five sessions, mixing technical work, conditioning, and full team practice.
High-performance programmes structure training in 4–6 week blocks where one technical theme appears in every warm-up, drill, and scrimmage. That repetition forces rapid neural consolidation. Pick one theme per block and do not drift from it.
4-week sample block: serve-receive focus
| Week | Theme | Session types | Success criteria |
|---|---|---|---|
| 1 | Passing platform and posture | 2 × technical, 1 × conditioning | 40 consecutive wall passes; 60% serve-receive accuracy |
| 2 | Directional passing to target | 2 × technical, 1 × scrimmage | 70% passes landing in target zone |
| 3 | Serve-receive under pressure | 1 × technical, 1 × conditioning, 1 × constrained game | Maintain good accuracy with live serving |
| 4 | Integration and assessment | 2 × scrimmage, 1 × deload | Reassess baseline metrics from Week 1 |
Deloading: Week 4 is deliberately lighter. Drop volume by roughly a third, keep intensity, and use the extra time to film and review your technique. If your Week 4 metrics beat Week 1, the block worked. If not, the theme was right but the drill design probably needs adjusting.
Progression rule: never increase both volume and intensity in the same week. Add reps or add difficulty, not both simultaneously.
Common practice mistakes and how to fix them
Most players do not practise badly because they lack effort. They practise badly because the session design rewards the wrong things.
The most common errors:
- Too many blocked drills: hitting 50 balls in a row from the same toss, at the same height, from the same position. It feels productive. It trains a pattern that disappears the moment the ball comes from a different angle.
- No scoring or targets: if there is no way to fail, there is no pressure, and without pressure the drill does not transfer to match play.
- Skipping the warm-up: jumping straight into hard hitting or serving cold is the fastest route to a shoulder or knee problem.
- Practising the comfortable skill: players naturally gravitate to what they are already good at. A setter who spends 40 minutes setting and 5 minutes on serve-receive is reinforcing a strength and ignoring a weakness.
- No progression: running the same drill at the same difficulty week after week produces a plateau within two to three sessions.
Immediate fixes:
- Add a scoring rule to every drill, even a simple one (“count how many land in target out of 10”)
- Change one variable per drill every two sessions: distance, trajectory, starting position, or time pressure
- Spend the first 10 minutes of every session on your weakest skill, not your strongest
How to film practice and track the metrics that matter
You do not need a camera crew. A phone propped against a bag at the back of the court captures enough to be genuinely useful.
Filming checklist:
- Serving: camera behind and slightly to the side of the server, capturing the full approach and contact point
- Passing: camera at net height, side-on, so you can see platform angle and foot position
- Hitting: camera at the back of the court, slightly elevated if possible, to capture the approach and arm swing
Metrics worth tracking
| Metric | How to collect | Frequency |
|---|---|---|
| Serve-to-target % | Count serves landing in marked zone / total serves | Every serving session |
| Passing accuracy | Count passes landing in target zone / total passes | Every passing session |
| Kill efficiency | Count kills / total attack attempts in scrimmage | Weekly scrimmage |
| Consecutive passes (wall) | Count unbroken runs in solo session | Every solo session |
The most useful feedback loop is a 1-minute video review immediately after a drill block. Watch one contact, identify one thing to change, and apply it in the next set. That cycle, repeated four or five times in a session, produces faster improvement than watching an hour of footage the following day.
Peer scoring is underused at club level. Give a training partner a tally sheet with two columns: “in target” and “out.” They count while you drill. You switch. The act of counting forces the counter to watch carefully, which is itself a coaching habit worth building.
Why do these drills work? The motor-learning principles behind them
The single most important principle in practice design is this: random, gamelike practice that varies distance, height and movement produces better match transfer than blocked, repetitive drills. That is not an opinion. It is the consistent finding from motor-learning research and the basis of how USA Volleyball structures its lesson plans.
Blocked practice (same skill, same conditions, repeated) produces fast short-term gains that look impressive in training. Random practice (varying the skill, the condition, or the sequence) produces slower short-term gains but far better retention and transfer. The gap between how good a player looks in a blocked drill and how good they perform in a match is almost always a practice-design problem.
Constraints-led coaching is the practical application of this. Instead of telling a player what to do, you change the environment so the correct behaviour is the only efficient option. A scoring rule that rewards only passes landing in a target zone is a constraint. A game where you can only score off a back-row attack is a constraint. Small scoring systems and time constraints replicate match pressure and increase retention without requiring a coach to give constant verbal feedback.
For the neuromuscular side of this, reactive neuromuscular training explains why drills that include an unpredictable cue (a coach signal, a colour call, a random toss direction) build faster decision-making than predictable repetition.
Pro Tip: Coaches: design constraints before you design drills. Ask “what behaviour do I want to see?” then build the rule that makes that behaviour the only way to score. You will spend less time correcting and more time watching players solve problems.
How to build mental skills into your practice sessions
Mental skills are not a separate module you add at the end of a session. They are built into the structure of every drill, if you design the session correctly.
Focus cues are the simplest tool. Before each serve or attack, pick one technical cue (“contact point”, “step through”, “eyes on the seam”) and say it silently. This narrows attention to the relevant detail and blocks out distraction. Over time, the cue becomes automatic and fires without conscious effort.
Pressure simulation is where most club sessions fall short. A drill with no consequence trains a player who performs well when nothing is at stake. Add a consequence: if you miss three serves in a row, you run a court width. If the team fails to score three consecutive points in the constrained game, they serve again from the start. Small stakes create the mild stress response that match play produces, and practising under that response is what builds composure.
Visualisation before a session takes two minutes and is consistently underused. Sit quietly, close your eyes, and run through three or four successful contacts in your mind: the approach, the contact, the ball landing in the target zone. Research in sport psychology supports pre-session visualisation as a tool for priming motor patterns, particularly for technical skills like serving and setting.
Reset routines matter as much as any drill. Every elite player has a between-point routine: a breath, a word, a physical gesture that signals “last point is done, next point starts now.” Build yours in practice. After every error in a drill, use the same reset before the next attempt. By the time you are in a match, the routine is automatic.
Recovery and injury prevention for volleyball players
Volleyball is a high-repetition, high-impact sport. Shoulder overuse, patellar tendinopathy, and ankle sprains are the three most common injuries at club level in the UK, and all three are largely preventable with sensible practice habits.
Warm-up non-negotiables: never skip dynamic movement before any session. Leg swings (forward and lateral, 10 each side), hip circles, arm rotations, and two court-length jogs at increasing pace take five minutes and meaningfully reduce injury risk. Static stretching belongs at the end of a session, not the beginning.
Shoulder care for hitters and servers: the rotator cuff absorbs enormous load in every swing. Three exercises done three times per week protect it: external rotation with a resistance band (3 × 15), prone Y-T-W raises (2 × 10 each position), and scapular wall slides (2 × 12). These take eight minutes. Skipping them for months and then spending six weeks with a physio is the alternative.
Knee landing mechanics: every jump landing should be soft, with hips back and knees tracking over toes. If your knees cave inward on landing, reduce jump volume immediately and work on single-leg squats and lateral lunges until the pattern is clean. Patellar tendinopathy builds gradually and becomes chronic quickly.
Recovery between sessions: 48 hours between high-intensity sessions is a reasonable minimum for most players. Sleep is the primary recovery tool; no supplement or ice bath replaces it. If you are running three sessions per week, space them so you never train on consecutive days during the early weeks of a new block.
Ankle stability: court shoes with lateral support are not optional. Ankle bracing is worth considering if you have a history of sprains. Proprioception work (single-leg balance, wobble board) done for five minutes after each session builds the reactive stability that prevents re-injury.
Key takeaways
Structured, gamelike practice with clear targets and a 4-week theme produces faster, more durable improvement than unplanned repetition.
| Point | Details |
|---|---|
| Run three session types this week | Solo technical, conditioning/footwork, and scrimmage-focused sessions each build a different layer of skill. |
| Use the 30/45/60-minute templates | Each template includes a warm-up, priority skill, secondary skill, and a conditioned finish with a scoring rule. |
| Track one metric per session | Serve-to-target %, consecutive passes, or kill efficiency — one number, recorded every session, shows real progress. |
| Follow a 4-week themed block | Pick one technical theme (e.g. serve-receive) and run it through every session for four weeks before reassessing. |
| Levelup360hq for session tracking | Coaches and clubs can use Levelup360hq to log sessions, run video assessments, and track athlete metrics across a full training block. |
What actually separates players who improve from those who plateau
The conventional wisdom is that more practice equals more improvement. It does not. More structured practice does. The players who plateau fastest are usually the ones who practise the most, because they repeat the same comfortable patterns at the same difficulty level until the pattern is deeply grooved and completely inflexible.
The thing most coaches underestimate is how quickly a drill becomes too easy. Three sessions in, a player who struggled with 20 consecutive wall passes is hitting 50 without thinking. That is not a sign to celebrate and move on. That is the signal to make the drill harder immediately: add a target, add movement, add a time constraint, or change the angle. The moment a drill feels automatic, it has stopped producing adaptation.
The other overlooked point: mental rehearsal and reset routines are not soft skills. They are the mechanism by which technical work becomes match-ready behaviour. A player who can execute a float serve perfectly in a solo session but double-faults under pressure has a practice-design problem, not a technique problem. The solution is not more serving. It is serving under simulated pressure, with a consequence, using a reset routine between attempts.
Build the pressure in. Score everything. Change the drill before it gets comfortable. That is the habit that separates players who improve every month from those who look the same in April as they did in September.
Levelup360hq: structured tracking for coaches and clubs who want real data
Tracking sessions on a notepad works until it does not. When you are managing multiple athletes across a 4-week block, logging serve accuracy, reviewing technique footage, and trying to spot who is progressing and who is stalling, a paper system becomes the bottleneck.

Levelup360hq gives coaches and clubs a platform built around exactly this workflow: session management, video assessment with approval workflows, real-time player ratings, and analytics that show progression across a training block rather than just a single session. Athletes get live player cards and XP-driven challenges that make the metrics from the drills above feel like something worth competing for. For youth volleyball programmes and club academies in the UK, the white-label option means the platform carries your branding, not ours.
The players who benefit most are committed athletes who want to own their development data, and coaches who want to spend less time on admin and more time watching their players solve problems. If that sounds like your setup, try the demo and see how the session and video tools map to the practice structure in this article.
Useful sources and further reading
- Training without a net or friends (USA Volleyball) — practical solo drill guidance including wall distances and net-height marking
- Solo drills to improve your volleyball skills (USA Volleyball) — wall passing progressions and directional control drills
- Lesson plans for teachers and coaches (USA Volleyball) — gamelike and random practice frameworks underpinning the session templates
- Practice planning and warm-ups (CoachingVB) — session structure, constraints-led coaching and practice design principles
- How to get better at volleyball: a structured training roadmap (PlayingVolley) — 4–6 week training block methodology and metric tracking
- 10 volleyball-specific strength exercises (The Art of Coaching Volleyball) — conditioning exercises for jump power and landing control
- Volleyball training: complete guide (PureVolley) — court-based conditioning and reactive movement integration
- 20 volleyball passing drills (Valley Athletics) — passing rep schemes including the 5-3-5-3-5 structure
- Reactive strength exercises for sport (HTK Training) — plyometric and reactive strength progressions for court sport
- Reactive neuromuscular training: a complete guide (HTK Training) — neuromuscular training methods that underpin decision-making drills
- Levelup360hq: track, develop, perform — session tracking, video assessments and analytics for clubs and athletes
Recommended
Turn potential into a player card.
LevelUp360 tracks every match, builds your child's player card, and shows their development over time.
Get started free